Repotting House Plants into Bigger Pots: A Complete Guide

Introduction to Repotting House Plants Guide
In this comprehensive guide, we will explore the importance of repotting house plants, including the right timing and pot size. We’ll also discuss common signs that indicate a plant is ready for repotting. By understanding why repotting matters, we can enhance root development, promote better nutrient absorption, and prevent root-bound plants.
Why Repotting Matters
Repotting is essential for the overall health and growth of house plants. Here’s why:
Enhancing Root Development for Healthier Plants
Repotting provides an opportunity for plants to develop a stronger root system. When the roots outgrow their current pot, they can become cramped and restricted. By moving them into a larger pot, we allow the roots to spread and establish themselves more effectively. This leads to healthier plants with increased stability and improved nutrient uptake.
Promoting Better Nutrient Absorption and Moisture Retention
As plants grow, they deplete the nutrients present in their current potting soil. By repotting, we can refresh the soil and provide a fresh supply of nutrients for the plant. Additionally, larger pots offer more space for the soil to retain moisture, reducing the risk of dehydration for the plants. This promotes overall growth and vitality.
Preventing Root-Bound Plants and Promoting Overall Growth
When plants become root-bound, their roots become tightly packed and begin to circle around themselves. This can hinder their growth and development, ultimately leading to stunted plants. Repotting prevents this by giving the roots ample space to spread out and grow naturally. It allows plants to reach their full potential and thrive.
Determining Ideal Timing and Pot Size
Recognizing the signs that indicate a plant needs repotting is crucial. Additionally, choosing the right pot size for different types of house plants is essential. Let’s delve deeper into these factors:
Recognizing Signs That a Plant Needs Repotting
Look out for certain signs that indicate a plant needs repotting. These include:
- Roots are visibly growing out of drainage holes.
- The plant is becoming top-heavy and leaning to one side.
- Stunted growth or yellowing leaves despite proper care.
- Water is draining quickly through the pot, indicating a lack of soil space.
- The root ball takes up most of the pot, leaving little room for soil.
Choosing the Right Pot Size for Different Types of House Plants
Different house plants have varying root systems and growth habits. When selecting a new pot, consider the plant’s size and growth potential. For smaller plants, choose a pot that is one to two inches larger in diameter than the current pot. Larger plants may require a pot that is two to four inches larger. This provides enough room for the roots to expand without overwhelming the plant.
Understanding the Appropriate Repotting Season for Optimal Results
While repotting can be done throughout the year, it is best to do it during the plant’s active growing season, usually spring or early summer. During this time, plants are better equipped to recover from the repotting process and adjust to their new pot. However, if a plant urgently needs repotting due to severe root-bound conditions, it can be done at any time.
Preparing for repotting
Before diving into the repotting process, it is essential to gather the necessary materials and tools, create a suitable work area, and prepare the new pot and potting mixture.
Gathering the necessary materials and tools
Make sure you have the following materials and tools ready before starting the repotting process:
- Potting pots, containers, or planters.
- Fresh potting soil or a suitable soil mixture.
- Drainage materials like gravel or pebbles.
- A watering can or spray bottle.
- Gardening gloves and a small trowel.
Setting Up an Ideal Work Area
Choose a well-ventilated and spacious location that allows you to comfortably work with the plant and potting materials. To protect surfaces from dirt and spills, lay down newspapers or drop cloths. Organize your tools and materials for easy access during the repotting process.
Preparing the New Pot and Soil
Before repotting, clean and sterilize the new pot to avoid transferring any diseases or pests. Choose a potting mixture suitable for the specific plant, considering factors like drainage and nutrient retention. Pre-moisten the potting mix, ensuring it is damp but not overly saturated. This promotes better root contact with the soil and prevents excessive water retention.
Repotting Process Step by Step
Replanting a house plant into a larger pot involves gentle handling of both the plant and its roots. Let’s dive into the step-by-step process:
Removing the plant from its current pot
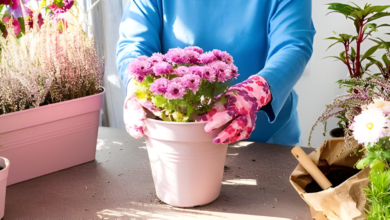
Before removing the plant, water it thoroughly to ensure the soil is moist. Gently tap the sides of the pot to loosen the root ball. Carefully lift the plant, supporting the base and stems, and avoid pulling it by the leaves or fragile stems.
Handling and Examining the Roots
Inspect the plant’s roots for signs of overgrowth or damage. Trim any overgrown or rotten roots using clean and sterilized pruning shears or scissors. Loosen any compacted roots by gently spreading them out.
Placing the Plant in the New Pot
Position the plant at the right height in the new pot, ensuring that the top of the root ball is level with the rim of the pot. Fill the pot with fresh soil, avoiding air pockets. Gently press the soil down to secure the plant in place.
Post-Repotting Care
After repotting, it’s essential to provide proper care to ensure the plant’s successful transition to its new pot and continued growth.
Watering and providing essential nutrients
Adjust the watering frequency and amount post-repotting to meet the plant’s needs. Monitor the soil moisture and water accordingly, ensuring it remains evenly moist but not waterlogged. Apply appropriate fertilizers to support new growth, following the manufacturer’s instructions. Be mindful of signs of over-watering, such as yellowing leaves or a foul odor, and adjust watering accordingly.
Acclimating the Plant to its New Environment
Help the plant acclimate to its new environment by gradually introducing it to sunlight or shade, depending on its lighting requirements. Control the temperature and humidity to create a stable environment. Minimize stress factors by avoiding drastic changes in lighting, temperature, or humidity.
Monitoring Post-Repotting Issues
Keep a close eye on the plant for any post-repotting problems. Transplant shock can occur, leading to temporary wilting or slowed growth. If this happens, provide additional care, such as increased humidity, careful watering, or temporary shade. Regularly observe the plant’s health and address any issues promptly.
Summary and FAQs
Summary to Repotting House Plants Guide
In conclusion, repotting house plants into bigger pots is essential for their health and growth. By enhancing root development, promoting nutrient absorption, and preventing root-bound plants, repotting allows plants to thrive. Remember to choose the right timing and pot size, prepare adequately, and follow the step-by-step process for a successful repotting experience.
FAQs to Repotting House Plants Guide
- Do plants grow better in bigger pots?
Plants generally perform better when provided with ample room for their roots to grow. Bigger pots allow for increased root development and nutrient absorption, promoting healthier and more robust growth.
- Do indoor plants need big pots?
Indoor plants require pots that accommodate their root systems as they grow. While they may not need excessively large pots, it’s important to select a size that allows for adequate root expansion and nutrient uptake.
- Does it matter when you repot indoor plants?
Timing does matter when repotting indoor plants. It is best to repot during the plant’s active growing season, usually spring or early summer, to minimize stress and promote faster root establishment.
- Should you remove old soil when repotting?
While it’s not essential to remove all the old soil, gently shaking off loose soil or pruning some of the outer roots can help stimulate new root growth. However, if the previous soil is contaminated or severely depleted, it’s wise to remove and replace it with fresh soil.