How to Make Your Own Handmade Flower Pot

Introduction to Handmade Flower Pots
I have always been fascinated by the idea of adding a personal touch to my home decor through handmade items. One of my favorite DIY projects is creating my own handmade flower pots. Not only do they add a unique and artistic flair to my living space, but they also make for wonderful gifts for friends and family.
When it comes to making handmade flower pots, the possibilities are endless. You can experiment with different shapes, sizes, colors, and textures to match your personal style and the aesthetic of your home. Whether you prefer a rustic terracotta look or a sleek modern design, there is a handmade flower pot project out there for you.
What I love most about making my own flower pots is the creative process. From molding the clay to painting and decorating the finished product, each step allows me to express my creativity and bring my vision to life. Plus, working with my hands has a therapeutic and calming effect, making the DIY process even more rewarding.
Handmade flower pots also have a special charm that store-bought pots simply can’t replicate. Each pot I make is infused with a sense of care and craftsmanship, making it a truly one-of-a-kind piece. Whether displayed indoors on a windowsill or outdoors in the garden, handmade flower pots add a personal touch to any space.
In this guide, I will walk you through the steps to create your own handmade flower pot, sharing tips and tricks I’ve learned along the way. Get ready to unleash your creativity and spruce up your living space with beautiful handmade flower pots!
Benefits of Using Handmade Flower Pots
I have found several benefits to using handmade flower pots in my gardening endeavors:
- Unique Design: Handmade flower pots come in a variety of shapes, sizes, and designs, adding a unique touch to my garden that sets it apart from others.
- Quality Craftsmanship: Since handmade flower pots are crafted with care and attention to detail, I have noticed that they are often more durable and long-lasting compared to mass-produced options.
- Customization Options: I appreciate the opportunity to work with artisans to create custom-made flower pots that suit my specific preferences and needs perfectly.
- Supporting Artisans: By purchasing handmade flower pots, I am able to support artisans and local businesses, contributing to the preservation of traditional craftsmanship.
- Environmentally Friendly: Handmade flower pots are often made from eco-friendly materials, reducing my carbon footprint and supporting sustainable practices.
- Aesthetically Pleasing: The unique textures and finishes of handmade flower pots add a touch of charm and elegance to my garden, enhancing its overall aesthetic appeal.
- Personal Connection: I feel a sense of connection and pride in caring for plants housed in pots that were individually crafted with passion and skill.
In my experience, using handmade flower pots has not only elevated the visual appeal of my garden but also enriched my gardening journey by supporting artisans and embracing sustainable practices.
Materials and Tools Needed for Making Handmade Flower Pots
I will need the following materials and tools to create my own handmade flower pots:
- Clay: This will be the main material used to form the flower pot. Choose a high-quality clay that is easy to mold and shape.
- Water: Water will help me moisten the clay to make it more pliable for molding.
- Pottery Tools: Tools such as a clay cutter, shaping tools, and a pottery wheel (optional) will be essential for shaping and carving the clay.
- Rolling Pin: A rolling pin will help flatten the clay evenly to create the base and walls of the flower pot.
- Cutting Wire: This tool is handy for cutting the clay cleanly and precisely.
- Paints or Glazes: I will need paints or glazes to add color and decoration to the finished flower pot.
- Paintbrushes: Various sizes of paintbrushes will be required for detailing and painting the flower pot.
- Kiln or Oven: A kiln is necessary for baking the clay to harden and set the shape of the flower pot. If a kiln is not available, a regular oven can be used as an alternative.
- Protective Gear: Wear gloves and an apron to protect clothing and skin from the clay and paints.
With these materials and tools, I can start creating my own unique handmade flower pots.
10 Unique Handmade Flower Pot Ideas
I have compiled a list of ten unique handmade flower pot ideas that you can easily create to add a personal touch to your gardening space. These ideas are not only creative but also fun to make. Here they are:
- 1. Mosaic Flower Pot: Use broken tiles, glass beads, or colored stones to create a beautiful mosaic design on a plain terracotta pot.
- 2. Chalkboard Paint Pot: Paint a clay pot with chalkboard paint to create a fun and interactive flower pot that you can customize with drawings or messages.
- 3. Decoupage Flower Pot: Decorate a clay pot with decoupage techniques using colorful napkins, magazine cutouts, or decorative paper.
- 4. Fabric-Covered Pot: Wrap a terracotta pot with your favorite fabric using Mod Podge for a colorful and textured look.
- 5. Ombre Painted Pot: Create a trendy ombre effect by painting a clay pot with graduating shades of the same color.
- 6. Geometric Pattern Pot: Use painter’s tape to create geometric patterns on a plain pot and paint over it for a modern and stylish design.
- 7. Vintage Tea Tin Pot: Repurpose vintage tea tins as unique and charming flower pots for a touch of nostalgia.
- 8. Embossed Clay Pot: Use stamps or textured rollers to create embossed designs on a clay pot for a sophisticated look.
- 9. Yarn-Wrapped Pot: Wrap yarn or twine around a pot, securing it with glue, to add a cozy and textural element to your plant display.
- 10. Seashell-Adorned Pot: Glue small seashells onto a pot for a beachy and coastal-inspired flower pot that is perfect for summer.
These handmade flower pot ideas are sure to elevate your gardening experience and bring a touch of creativity to your plant decor.
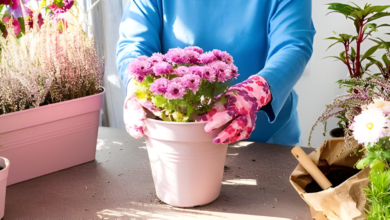
1. Terracotta Pot with Hand-painted Design
When making a terracotta pot with a hand-painted design, start by selecting a plain terracotta pot in the desired size. Choose acrylic paints that are suitable for terracotta surfaces to ensure vibrant and long-lasting colors.
- Prepare the Pot: Clean the terracotta pot with a damp cloth to remove any dust or dirt. Allow it to dry completely before starting with the painting process.
- Design Planning: Sketch your design on paper before transferring it to the pot. This will help you visualize the final look and make any necessary adjustments beforehand.
- Painting Process: Use a fine paintbrush to apply the acrylic paint carefully on the terracotta surface. Start with the base colors and allow them to dry before adding details or additional layers.
- Sealing the Design: Once you are satisfied with the painted design, seal it with a clear acrylic sealer to protect the paint from chipping or fading over time. Ensure the sealer is suitable for terracotta pots.
- Finishing Touches: Consider adding embellishments like glitter, sequins, or decorative ribbons to enhance the design further. Let the pot dry completely before placing plants inside.
By following these steps, I can create a personalized terracotta pot with a hand-painted design that complements my home decor or makes a thoughtful gift for someone special.
2. Macrame Hanger for Hanging Flower Pots
I find that macrame hangers give a bohemian touch to any space and are perfect for displaying hanging flower pots. Here’s how you can make your own macrame hanger:
- Materials Needed:
- Macrame cord
- Scissors
- Flower pot
- Instructions:
- Cut six pieces of macrame cord, each around 6 feet long.
- Fold all the cords in half and knot them together at the folded end, leaving a loop for hanging.
- Divide the cords into three groups of four and start creating square knots about 5 inches down from the top knot.
- Continue making square knots until the desired length is reached. Make sure your pot fits snugly into the macrame holder.
- To finish, tie all the cords together at the bottom.
- Customizations:
- You can add beads or other decorative elements to the macrame hanger for a personalized touch.
- Experiment with different knot patterns to create a unique look for your hanging flower pot.
- Hanging Your Flower Pot: Once your macrame hanger is ready, simply place your flower pot inside and adjust the cords to hang it at your desired height. Make sure to secure the hanger properly to support the weight of the plant.
By following these steps, you can create a beautiful macrame hanger for your hanging flower pots, adding a touch of handmade charm to your home decor.
3. Embedded Crystal Flower Pots
I enjoy adding a touch of elegance to my handmade flower pots by embedding crystals into them. Here is how I create these stunning crystal flower pots:
- Materials Needed:
- Clay or concrete mix
- Crystal beads or chips
- Flower pot molds
- Water
- Sandpaper
- Paint (optional)
- Clear varnish
- Steps to Create Embedded Crystal Flower Pots:
- Prepare your clay or concrete mix according to the instructions.
- Fill the bottom of the flower pot mold with a thin layer of the mix.
- Press the crystal beads or chips gently into the mix, creating your desired pattern or design.
- Continue filling the mold with the mix, ensuring the crystals are embedded securely.
- Let the pot dry completely as per the mix’s instructions.
- Once dry, carefully remove the pot from the mold.
- Sand any rough edges or imperfections for a smooth finish.
- If desired, you can paint the pot to complement the crystals.
- Finish off with a coat of clear varnish for a polished look and added protection.
Creating embedded crystal flower pots adds a touch of glamour and uniqueness to your planters. These pots make stunning centerpieces or thoughtful gifts for loved ones. Experiment with different crystal sizes, shapes, and colors to personalize your creations and watch as your plants sparkle in their new homes.
4. Mosaic Flower Pot Designs
Creating mosaic flower pots is a fun and creative way to add a pop of color and pattern to your garden or home. Here are some steps to help you make your own mosaic flower pot designs:
- Gather Materials:
- Flower pot
- Broken ceramic tiles, glass pieces, or mosaic tiles
- Tile adhesive
- Grout
- Sponge
- Gloves
- Prepare the Flower Pot:
- Clean the flower pot and make sure it is dry.
- If you want to paint the pot a base color, do so and let it dry completely.
- Design:
- Plan out your design on the pot before gluing any pieces.
- Cut or break the tiles to fit your design if necessary.
- Apply Tiles:
- Spread a thin layer of tile adhesive on a small section of the pot.
- Press the mosaic tiles or glass pieces into the adhesive.
- Continue this process until the entire pot is covered in your design.
- Grout:
- Once the adhesive is dry, apply grout over the tiles using a sponge.
- Make sure the grout gets into all the spaces between the tiles.
- Wipe off excess grout with a damp sponge.
- Finishing Touches:
- Clean the tiles with a dry cloth once the grout is dry.
- Polish the tiles to make them shine.
- Place your favorite plants in the mosaic flower pot and enjoy your handmade creation!
Creating mosaic flower pots allows for endless creativity and personalization. Experiment with different colors and patterns to make a unique piece that reflects your style and personality.
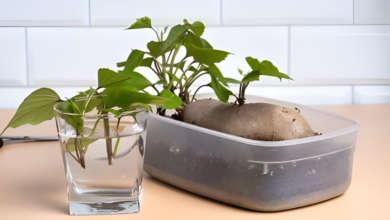
5. Upcycled Vintage Container Flower Pots
I enjoy the charm of upcycling vintage containers into unique flower pots. Here’s how I transform old teacups, tin cans, or mason jars into delightful homes for my plants:
- Selecting Containers: Look for containers with character, like teacups with delicate patterns, tin cans with retro designs, or mason jars with a rustic appeal.
- Preparing the Containers: Ensure the containers are clean and dry. For tin cans, remove any sharp edges carefully.
- Drainage Holes: If the container doesn’t have drainage holes, use a drill to create a few at the bottom. This step is crucial for preventing root rot.
- Protecting Surfaces: To avoid water leakage, place a small piece of fine mesh or a coffee filter over the drainage holes before adding soil.
- Adding Soil and Plant: Fill the container with potting soil, leaving enough space for the plant’s roots. Carefully transfer your chosen plant into the container, gently patting down the soil around it.
- Placement and Care: Find the perfect spot for your upcycled vintage container flower pot based on your plant’s sunlight needs. Remember to water your plant appropriately and ensure excess water can drain out easily.
By upcycling vintage containers into flower pots, I not only add a personal touch to my space but also give new life to old items in an eco-friendly way.
6. Concrete Handmade Flower Pots
When it comes to durability and a modern aesthetic, concrete flower pots are an excellent choice for a handmade project. Here’s how to make your own concrete flower pots:
- Gather Materials:
- Concrete mix
- Water
- Bucket for mixing
- Mold (plastic containers, cardboard boxes, etc.)
- Cooking spray
- Gloves and mask for safety
- Decorative elements (optional)
- Prepare the Mold:
- Choose a mold in the size and shape you desire for your flower pot.
- Coat the inside of the mold with cooking spray to help release the concrete once it has set.
- Mix and Pour Concrete:
- In a well-ventilated area, mix the concrete according to the instructions on the package.
- Pour the concrete mix into the prepared mold, making sure to remove any air bubbles by tapping the mold gently.
- Add Decoration (Optional):
- Embed decorative elements like glass gems, shells, or mosaic tiles into the wet concrete to give your flower pot a personalized touch.
- Allow to Set:
- Cover the mold with plastic wrap and allow the concrete to set and cure for at least 24-48 hours in a cool, dry place.
- Demold and Finish:
- Carefully remove the hardened concrete from the mold.
- Sand any rough edges and seal the concrete with a concrete sealer for added protection and a polished look.
By following these steps, I can create unique and sturdy concrete flower pots that will add a touch of industrial chic to my garden or home decor.
7. Fabric Wrapped Flower Pots
When looking for a creative way to add a touch of color and texture to your flower pots, fabric wrapping is a fantastic option. Here’s how you can easily personalize your pots with fabric:
- Gather Your Materials:
- Flower pots
- Fabric of your choice
- Scissors
- Mod Podge or white glue
- Paintbrush
- Ribbon or embellishments (optional)
- Cut the Fabric: Measure the height and circumference of your pot. Cut the fabric accordingly, leaving a little extra to overlap.
- Apply Adhesive: Using a paintbrush, apply a generous amount of Mod Podge or white glue to a section of the pot.
- Wrap the Fabric: Place the fabric onto the glued section and press it down firmly. Continue this process, working in small sections around the pot.
- Smooth Out Wrinkles: Make sure to smooth out any wrinkles or air bubbles as you wrap the fabric around the pot.
- Secure the Edges: Fold the top and bottom edges of the fabric over the lip and base of the pot. Use extra adhesive if needed to secure them in place.
- Add Embellishments (Optional): For an extra decorative touch, tie a ribbon around the top of the pot or glue on other embellishments like buttons or sequins.
Fabric-wrapped flower pots are a charming way to showcase your creativity and style. Whether you choose a colorful pattern or a neutral fabric, this DIY project adds a personal touch to your indoor or outdoor space. Let your imagination run wild as you transform plain pots into eye-catching decor pieces that brighten up any room or garden.
8. Wooden Handmade Flower Pot Holders
I enjoy adding a touch of natural warmth to my indoor space by incorporating wooden elements. Making wooden handmade flower pot holders is a creative way to enhance the beauty of your plants. Here’s how you can create your own wooden pot holders:
- Materials Needed:
- Wood planks
- Saw
- Sandpaper
- Wood glue
- Clamps
- Measure and Cut the Wood:
- Measure and mark the wood planks according to the desired size of your pot holder.
- Use a saw to cut the wood along the marked lines.
- Sand the Edges:
- Smooth out the edges of the wood pieces using sandpaper to prevent any splinters.
- Assemble the Holder:
- Apply wood glue to the edges of the wood pieces and join them together to form a box-like structure.
- Secure the pieces in place using clamps and let the glue dry completely.
- Add Decorative Touches:
- Once the glue is dry, you can add decorative elements like carvings or wood stain to customize your pot holder.
- Place Your Flower Pot:
- Once the holder is ready, place your favorite flower pot inside and display it in your home or garden.
- Maintenance:
- Make sure to protect your wooden pot holder from moisture to prevent warping or damage.
- Regularly clean and polish the wood to maintain its natural beauty.
Creating wooden handmade flower pot holders allows you to showcase your creativity while adding a touch of rustic charm to your living space. Experiment with different wood types and designs to create a unique and personalized pot holder that complements your plants beautifully.
9. Polymer Clay Flower Pot Creations
I find creating flower pots with polymer clay to be a fun and creative way to add a personal touch to my planting experience. Here are some steps to guide you through making your own polymer clay flower pot creations:
- Gather Your Materials:
- Polymer clay in various colors
- Flower pots in different sizes
- Rolling pin
- Shape cutters
- Oven for baking clay
- Prepare the Clay:
- Soften the clay by kneading it until it is pliable.
- Roll out the clay to your desired thickness using a rolling pin.
- Create Your Design:
- Use shape cutters or mold the clay by hand to create flowers, leaves, or any other design you prefer.
- Adhere the clay pieces to the flower pot by gently pressing them onto the surface.
- Bake the Clay:
- Following the instructions on the polymer clay packaging, bake the flower pot in the oven to harden the clay and set the design.
- Finish and Seal:
- Once the clay has cooled, you can add any additional details or textures with paints or additional clay.
- Seal the clay with a clear varnish or sealant to protect the design and give it a glossy finish.
- Plant Your Flowers:
- After the sealant has dried, your polymer clay flower pot is ready to use. Plant your favorite flowers or herbs to complete the look.
Experiment with different colors, shapes, and designs to create unique and personalized flower pots that will brighten up any space in your home or garden.
10. Geometric Patterned Flower Pots
I love the modern and sleek look of geometric patterns on flower pots. To create your own geometric patterned flower pots, you will need some basic supplies and a bit of creativity. Here’s how to make them:
- Gather Your Supplies:
- Flower pots (either terracotta or plastic)
- Painter’s tape
- Acrylic paints in various colors
- Paintbrushes
- Clear sealer (optional)
- Choose Your Design: Before starting, decide on the geometric pattern you want to create. Some ideas include stripes, triangles, squares, or even more intricate patterns like chevron or herringbone.
- Mask off the Design: Using painter’s tape, carefully mask off the areas of the flower pot where you want to create your pattern. Make sure the tape is pressed down firmly to prevent any bleeding of the paint.
- Paint Your Design: Using acrylic paints, carefully fill in the exposed areas with your chosen colors. You can opt for a single color or create a multicolored pattern for more visual interest. Let the paint dry completely before moving on to the next step.
- Remove the Tape: Once the paint is dry, gently peel off the painter’s tape to reveal your crisp geometric pattern underneath. If there are any touch-ups needed, use a small brush to fix any imperfections.
- Seal the Design (optional): To protect your geometric pattern and ensure it lasts longer, you can apply a coat of clear sealer over the painted areas. This will also give your flower pot a nice finish.
By following these steps, you can easily create stunning geometric patterned flower pots that will add a modern touch to your home or garden decor. Experiment with different colors and designs to make each pot unique and personalized.
Tips for Maintaining Handmade Flower Pots
I have compiled some useful tips to help you maintain your handmade flower pots in excellent condition:
- Regular Cleaning: Wipe your flower pots with a damp cloth regularly to remove dust and debris, keeping them looking fresh and vibrant.
- Avoid Harsh Chemicals: Refrain from using harsh cleaning chemicals as they can damage the finish and artwork on your handmade flower pots.
- Protect from Extreme Temperatures: Place your flower pots in locations where they are not exposed to extreme temperatures, as sudden changes can cause the material to crack or warp.
- Drainage Holes: Make sure your pots have proper drainage holes to prevent waterlogging, which can lead to root rot and other plant issues.
- Rotate Your Plants: To ensure even growth, rotate your plants periodically so that all sides receive adequate sunlight and air circulation.
- Inspect for Pests: Regularly check your plants and pots for any signs of pests or insects. If detected, take immediate action to prevent infestation.
- Avoid Dropping or Mishandling: Handle your handmade flower pots with care to avoid accidental drops or mishandling, which can lead to breakage or damage.
- Reapply Sealant: If your flower pots are sealed for protection, consider reapplying sealant annually to maintain their durability and resistance to wear and tear.
By following these maintenance tips, you can keep your handmade flower pots looking beautiful and prolong their lifespan for years to come.
Conclusion: Enhancing Your Home Decor with Unique Handmade Flower Pots
I have thoroughly enjoyed sharing the process of creating handmade flower pots with you. Incorporating these unique pieces into your home decor can truly elevate the aesthetic appeal of your living space. Here are some key takeaways to consider:
- Personalized Touch: Handmade flower pots add a personalized touch to your decor that mass-produced items simply cannot replicate. The effort and creativity put into crafting each piece make it special and exclusive to your home.
- Customization: By making your own flower pots, you have the freedom to customize them according to your style preferences, color schemes, and size requirements. This allows you to create a cohesive look that complements the overall design of your home.
- Creativity and Expression: Crafting handmade flower pots is a creative outlet that allows you to express yourself artistically. You can experiment with different shapes, textures, and embellishments to create one-of-a-kind pieces that reflect your personality.
- Cost-Effective: Making your own flower pots can be a cost-effective way to decorate your home. By using materials that are readily available or upcycling items you already have, you can create beautiful decor pieces without breaking the bank.
- Unique Decor Items: Handmade flower pots stand out as unique decor items that catch the eye and spark conversations. They can serve as focal points in a room or complement existing decorations, adding charm and character to your living space.
Incorporating handmade flower pots into your home decor is a rewarding and creative process that allows you to infuse your personal style into your living environment. I hope this guide has inspired you to embark on your own journey of creating unique and beautiful flower pots for your home. Happy crafting!